Make Your Own Pots
There are many options for seed starting, from plastic trays, individual plastic pots, peat pots, paper pots, soil blocking, and more. There are pros and cons of each approach.
This post is about recycling paper grocery bags into degradable paper pots for seedlings. There are paper pots available in various forms for purchase. For those interested in saving on cost, making your own pots while recycling those paper grocery bags is a nice little project.
One advantage of these single use paper pots over plastic trays or plastic pots is you plant the whole pot, so there is less root disruption when transplanting. Particularly great for plants that don’t like roots disturbed (such as cucumbers and squash). Also quick and easy to plant without having to extract the plant roots from a tray or plastic pot.
The advantage over purchasing paper pots is you save some money. Also a nice way to recycle the paper bags. There is time involved in making them, but if you are starting 50 to 100 seedlings the savings adds up.
We explain a simple way to make them. With a little planning and practice, we can make 30 pots in less than 30 minutes. Retail prices on paper pots is about $0.50 per pot, so we’d save about $15 with 30 minutes effort.
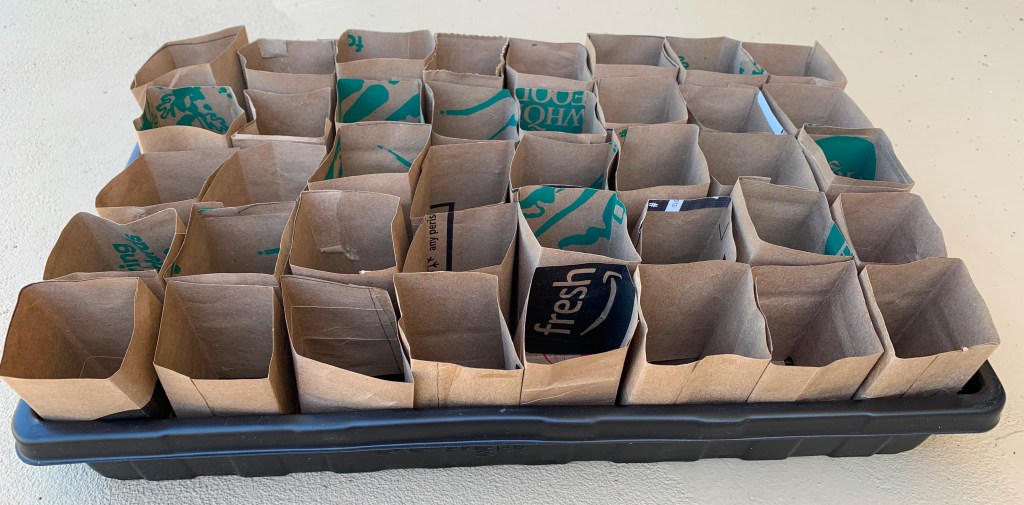
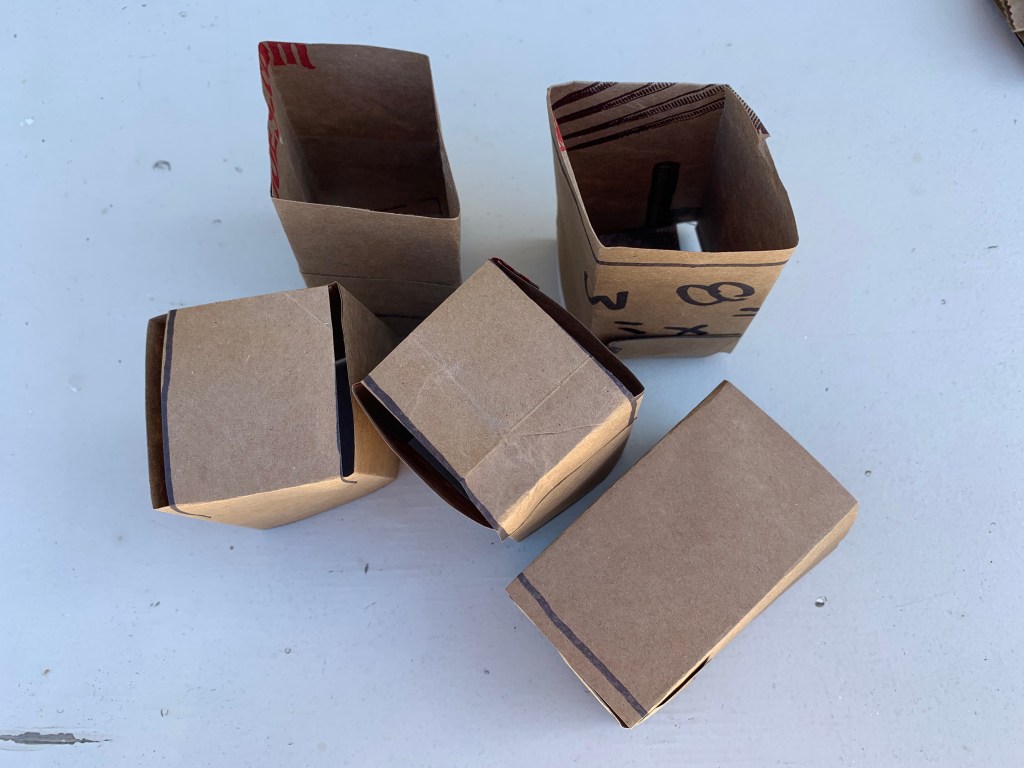
These instructions are for making 2″ x 2″ pots, 3″ tall. They are actually slightly smaller by about 1/8″ because that fits our tray. You can certainly adapt the dimensions to make larger or smaller pots. We are using a 10″ x 16″ plastic tray for seed starting. These pots fill the tray with 5 rows of 8 pots, a total of 40 pots.
Materials Needed
- One or more brown paper grocery bag (we get about 10-15 pots from one bag)
- Scissors
- Glue or glue stick
- Ruler or tape measure
- Pencil or pen
- Optional – if making a lot of pots, you can make some measuring templates to save time. We cut some cardboard to the sizes needed.
Instructions
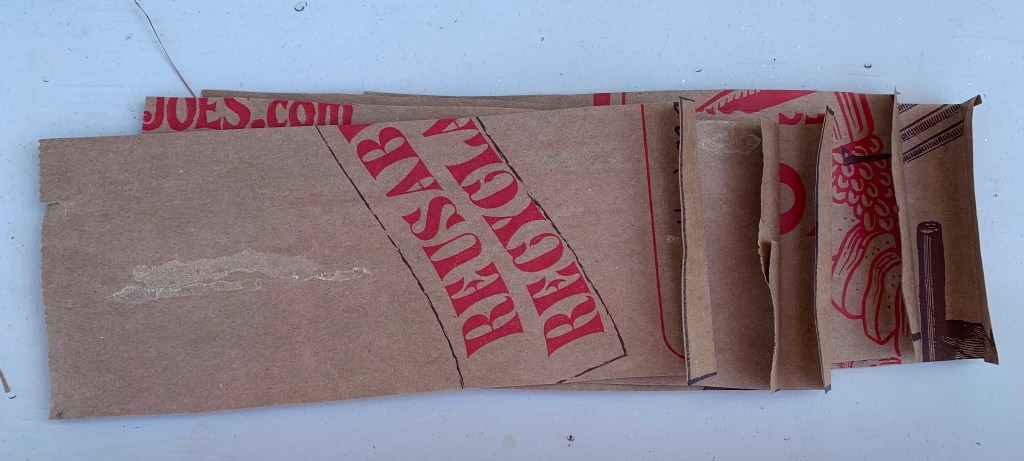
Step 1: Cut bottom off grocery bag and slit one side to open the bag flat
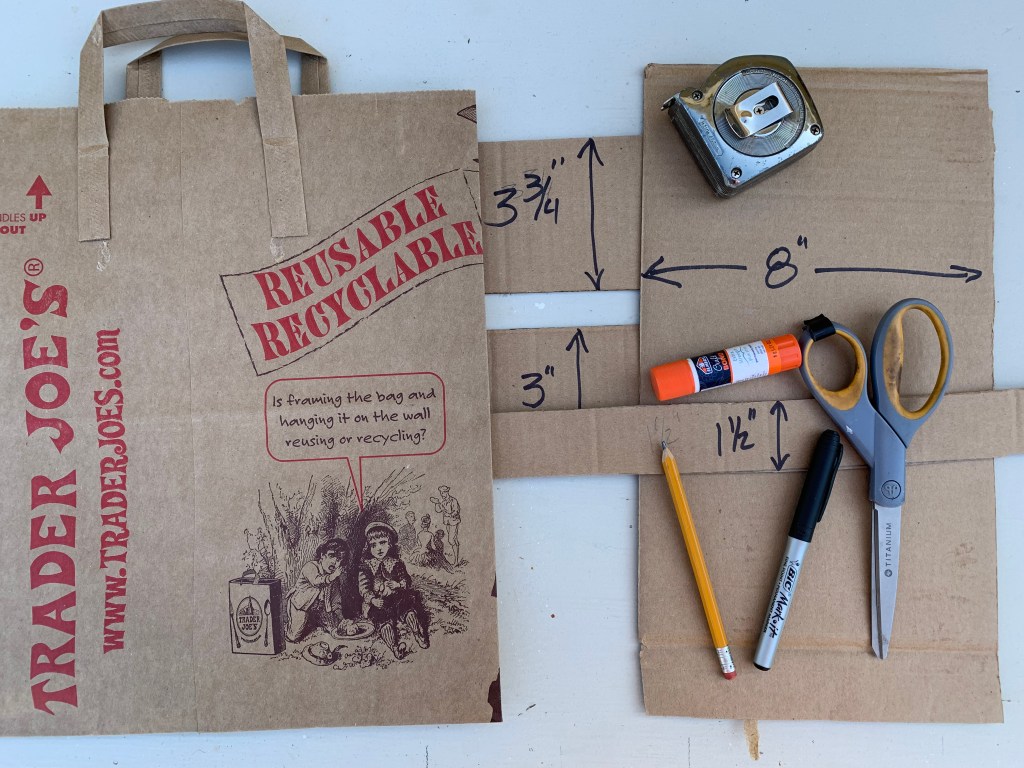
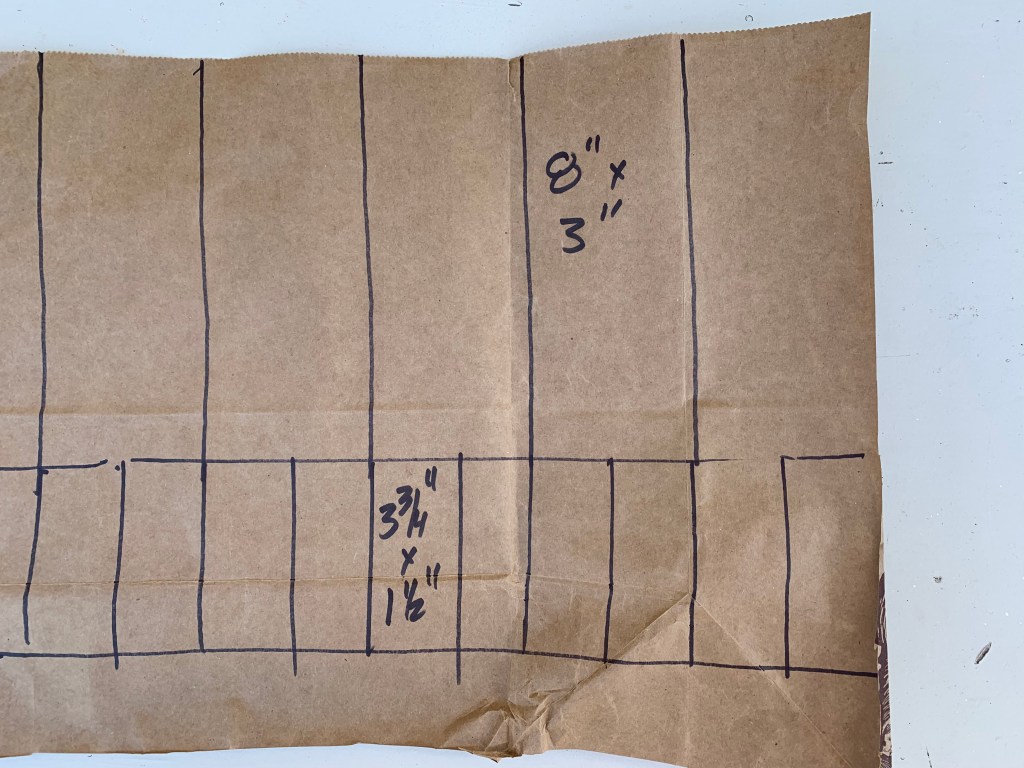
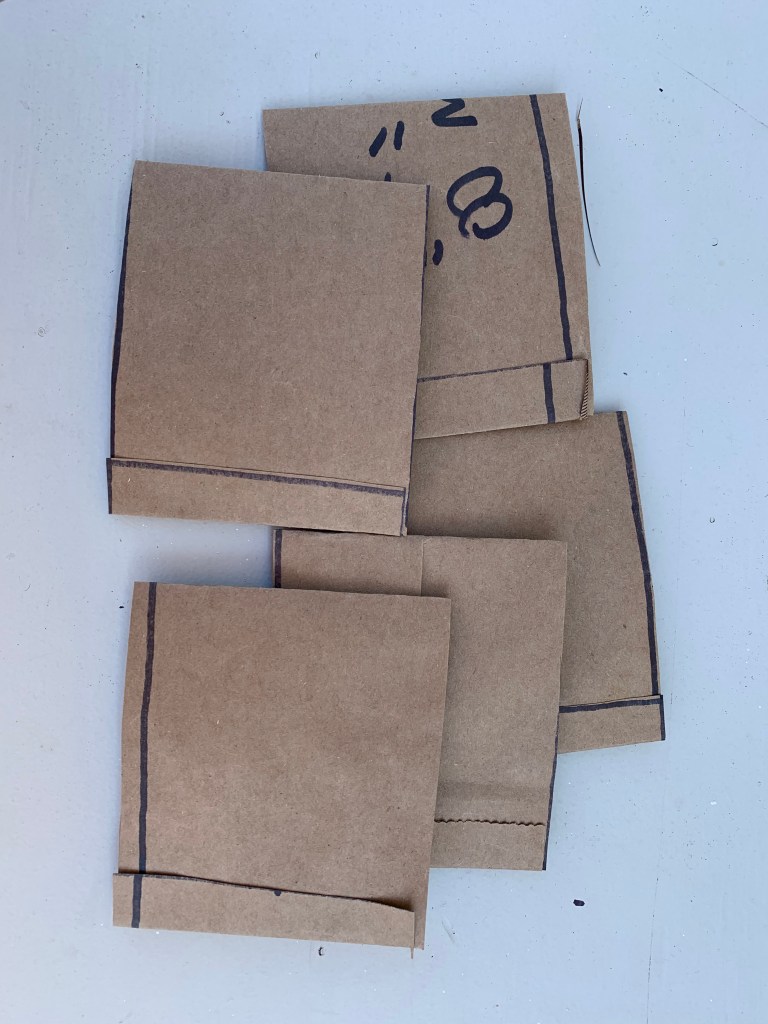
Step 2: Measure and mark for cutting. For the sides of pots, measure 8″ x 3″ pieces. For the bottoms measure 3 3/4″ x 1 1/2″ pieces. We cut some cardboard to use as templates to make it easy to mark without measuring. One 8″ wide, one 3″ wide, one 3 3/4″ wide, and one 1 1/2″ wide.
Step 3: Cut pieces. Another time saver is to cut two or more layers at a time if you are making a larger number of pots.
Step 4: Fold about 1/2″ of each side piece for making the seam.
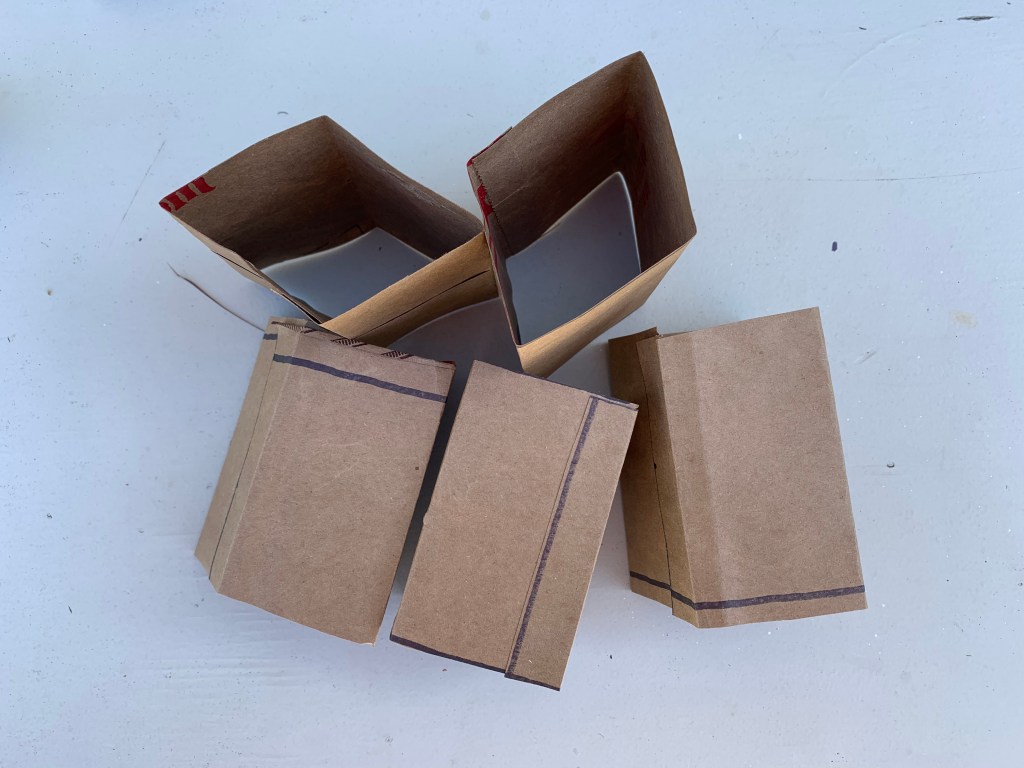
Step 5: Apply glue to seam and seal into a flattened tube shape. We used a glue stick and found it works best to apply glue to both sides to get ideal adhesion. A couple seconds of pressure gives a firm attachment. We save a little time by doing batches of 5 at a time. A swipe of glue on each of the 5 seams. Then grab one and apply glue to the opposite end, press into a flat tube, creasing the two sides.
Step 6: Open the flattened tubes and put the two creased corners over each other and then put a crease in the other sides. The result is a square tube.
Step 7: Fold or crease the bottom strip about 1/2″ to 3/4″ from one end.
Step 8: Glue the bottom strip to the pot on one side.
Step 9: Open the pot and put a crease in the other side of the bottom strip.
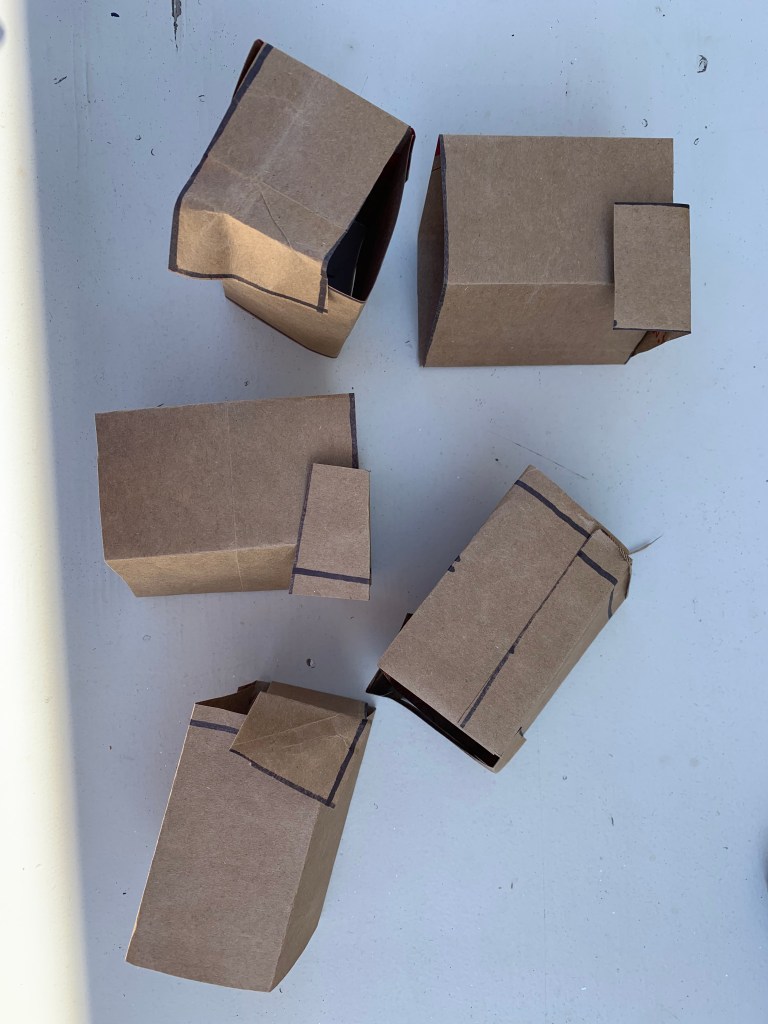
Step 10: Glue the other side of the bottom strip.
Pot is finished.
How to Use Pots
Fill pots with good quality seed starting mix. Make sure the mix is moistened before filling pots as the dry mix may not absorb water very well. Don’t pack the pots too tightly, just gently press the mix into pots. Seeds need a little air as well as water to grow well.
Specific seed starting process will vary depending on variety of seeds and growing environment. Some seeds, like tomatoes, peppers and eggplant will need a good warm environment. Others like lettuce need some light to help germination.
Keep seed starting mixture moist, but not too wet. Misting with a sprayer, or if pots are in a tray, you can add a little water to the tray and give bottom water. Be sure to drain any excess water from the tray after watering to avoid getting too soggy. Also a cover can help keep moisture in. Just check the pots at least daily for moisture. Go for the Goldilocks principle, not too wet, not too dry, get them just right!
When seedlings start popping up, make sure they get plenty of light for their growth. Not enough light, and they will get tall and leggy. Again depending on the plants and environment, you might use a grow light, or indirect sunlight. Direct sun will be too much for small seedlings at first.
Before transplanting, they need to be “hardened off” meaning they need to go from their warm pampered setting to the harsh sun, wind and cold of the real world. If not using grow lights, they will have been outside getting some good light already, so those plants will be mostly ready. Over a few days or a week increase amount of time outside first in filtered sun for a few hours, increasing until they get some full sun and are getting some cooler temperatures. Adjust depending on your weather and night temperature. The main idea is to gradually get them adjusted so they don’t get shocked when transplanted into full sun and cold night temperatures.
Once they reach desired size for transplanting, plant the whole pot. There will be openings in the bottom for the roots to easily grow through the bottom of the pot, but you can also tear off the bottom strip of the pot when planting to give them even more room to grow.
Most plants will be planted slightly deeper than the level of soil in the pot. Tomatoes do well planted deep, so only the top few leaves are above the ground. Tomatoes develop roots off the stems!
Hope that is helpful. If you have questions or comments, please let us know. You can comment below, send an email, or reach out on Instagram. All our contact info is below.
If you enter your email and subscribe, you will be notified of future posts that may be of interest.
Happy seed starting.

One response to “Paper Seed Starting Pots: From Grocery Bags”
Hi Bob and Mahnoosh Thanks so much for the very interesting information . I like the idea. The Best Shahnaz
LikeLike